
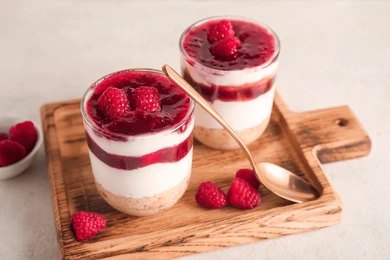
Cheesecake in a Jar is a fun, modern twist on the classic dessert, offering all the rich, creamy goodness of cheesecake in a convenient, portable form. These individual servings are layered beautifully, making them as visually appealing as they are delicious.Perfect for parties, picnics, or quick indulgence, these no-bake treats save time without sacrificing flavour.
Cheesecake in a Jar:
The combination of a buttery biscuit base, smooth cheesecake filling, and fruity or chocolate toppings creates a delightful balance in every spoonful.Whether you’re entertaining guests or preparing a make-ahead dessert, Cheesecake in a Jar is an easy and impressive option that requires minimal effort and delivers maximum satisfaction.
History:
Traditional cheesecake dates back to ancient Greece and evolved over centuries into the creamy dessert we know today. The no-bake version became popular in the 20th century as a quicker alternative.The “dessert in a jar” trend is a more recent innovation, inspired by the need for portable, portion-controlled treats. Combining cheesecake with jar presentation has made this dessert especially popular for events and gifting.
Subscribe to our youtube channel Kitchenpedia for more delicious recipes and hit the like button if you enjoyed this youtubevideo. Share it with your friends and Family.
Cheesecake in a Jar Creamy, No-Bake Mini Desserts Perfect
Ingredients
For the Base
- 1 cup crushed digestive biscuits or graham crackers
- 4 tablespoons melted butter
For the Cheesecake Filling
- 1 cup cream cheese (softened)
- ½ cup powdered sugar
- 1 teaspoon vanilla extract
- 1 cup whipped cream
For the Topping
- Fresh fruits (strawberries, blueberries, mango)
- Fruit compote or jam
- Chocolate sauce or caramel
- Crushed nuts
Instructions
- Mix crushed biscuits with melted butter.Spoon the mixture into jars and press down firmly to form a base layer.
- Beat cream cheese until smooth.
- Add powdered sugar and vanilla extract; mix well.Fold in whipped cream gently until light and fluffy.
- Add a layer of cheesecake filling over the biscuit base.
- Repeat layers if desired for a taller dessert.
- Top with fruits, sauces, or nuts of your choice.
- Refrigerate for at least 2 hours before serving.
Notes
- Use full-fat cream cheese for best texture.
- Chill sufficiently for firm layers.
- Adjust sugar based on sweetness preference.
- Use clear jars for attractive presentation.
- Do not overmix whipped cream.
- Fresh fruits enhance flavor and freshness.
- Store refrigerated at all times.
- Consume within 2–3 days.
Tips for Cheesecake in a Jar:
- Add lemon zest for a refreshing twist.
- Use flavored biscuits for variation.
- Layer with chocolate ganache for richness.
- Pipe filling for neat presentation.
- Use mason jars for portability.
- Add a crunchy topping just before serving.
- Try different fruit combinations.
- Make mini versions for parties.
FAQs for Cheesecake in a Jar:
Q1: Can I bake this cheesecake?
A: This version is no-bake, but you can adapt it for baking.
Q2: Can I use whipped topping instead of cream?
A: Yes, it works well as a substitute.
Q3: How long does it last?
A: Up to 3 days in the refrigerator.
Q4: Can I make it vegan?
A: Yes, use plant-based cream cheese and whipped cream.
Q5: Can I freeze it?
A: Freezing is possible but may affect texture.
Conclusion:
Cheesecake in a Jar is a simple yet elegant dessert that combines convenience with indulgence. Its creamy layers, crunchy base, and customizable toppings make it a versatile favorite for any occasion. With minimal effort and maximum flavor, it’s a recipe you’ll want to make again and again.